
/how-to-edit-video.webp?width=2000&height=1340&name=how-to-edit-video.webp "how-to-edit-video")
Video is taking over our lives.
If you’re like me, you’ve gone on what can only be called a “YouTube spiral.” This is when you’ll watch video after video and before you know it, four hours have passed and you finally come to and realize it's time to close the browser tab.
Nowadays, when you open Facebook or Twitter, you might see more videos than text statuses or photo posts combined. Social media platforms are adapting to and embracing this, with new video features being rolled out every day. In fact, Instagram recently released IGTV to allow for longer form video content on its platform, showing that video-heavy social media is here to stay.
The amount of content people sift through on a daily basis has lowered attention spans. Understanding how to edit video to account for this is essential to good editing. Editing footage so that it appears professionally done will increase view counts and watch time – two critical stats if you’re looking to become the next vlogger or filmmaker to hit it big.
Before getting started, it’s important to identify which video editing software is best for the type of project you’re creating. Some of this software can be expensive for amateur editors, so we compiled the best free video editing software to help you get started.
Any software you use will have slightly different capabilities, features, and nuances. Because of this, you’ll need to consider your editing needs and find the solution that is best fit to solve them. Most softwares share similar tools for marking, cutting, rearranging clips, and adding effects. The real choice comes down to the more detailed functionality.
After choosing your software, you can begin creating your project.
The first and last step are pretty simple, but the middle two are where you can express creativity and truly tell your story. Let’s walk through this process with a bit more detail so that you can crank out fresh and new video content for your audience.
When beginning a new project, think about where you plan on publishing your video. Certain platforms require specific aspect ratios or resolutions. This can be explained as the size and shape of your project. Understanding these settings right off the bat will save you lots of trouble later on.
More often, vertical or square videos dominate for short-form content because they are more easily viewed on mobile devices. Longer-form videos should usually be done in landscape or widescreen to upload to YouTube and Vimeo.
First time YouTubers can use this guide to learn how to upload video to YouTube.
You should always film more footage than you plan to use. A good rule of thumb before getting to the editing stage is to have about 40 percent more footage than what will be added to the project. This allows for more options when placing clips together. It’s much easier to cut stuff out than to add it in!
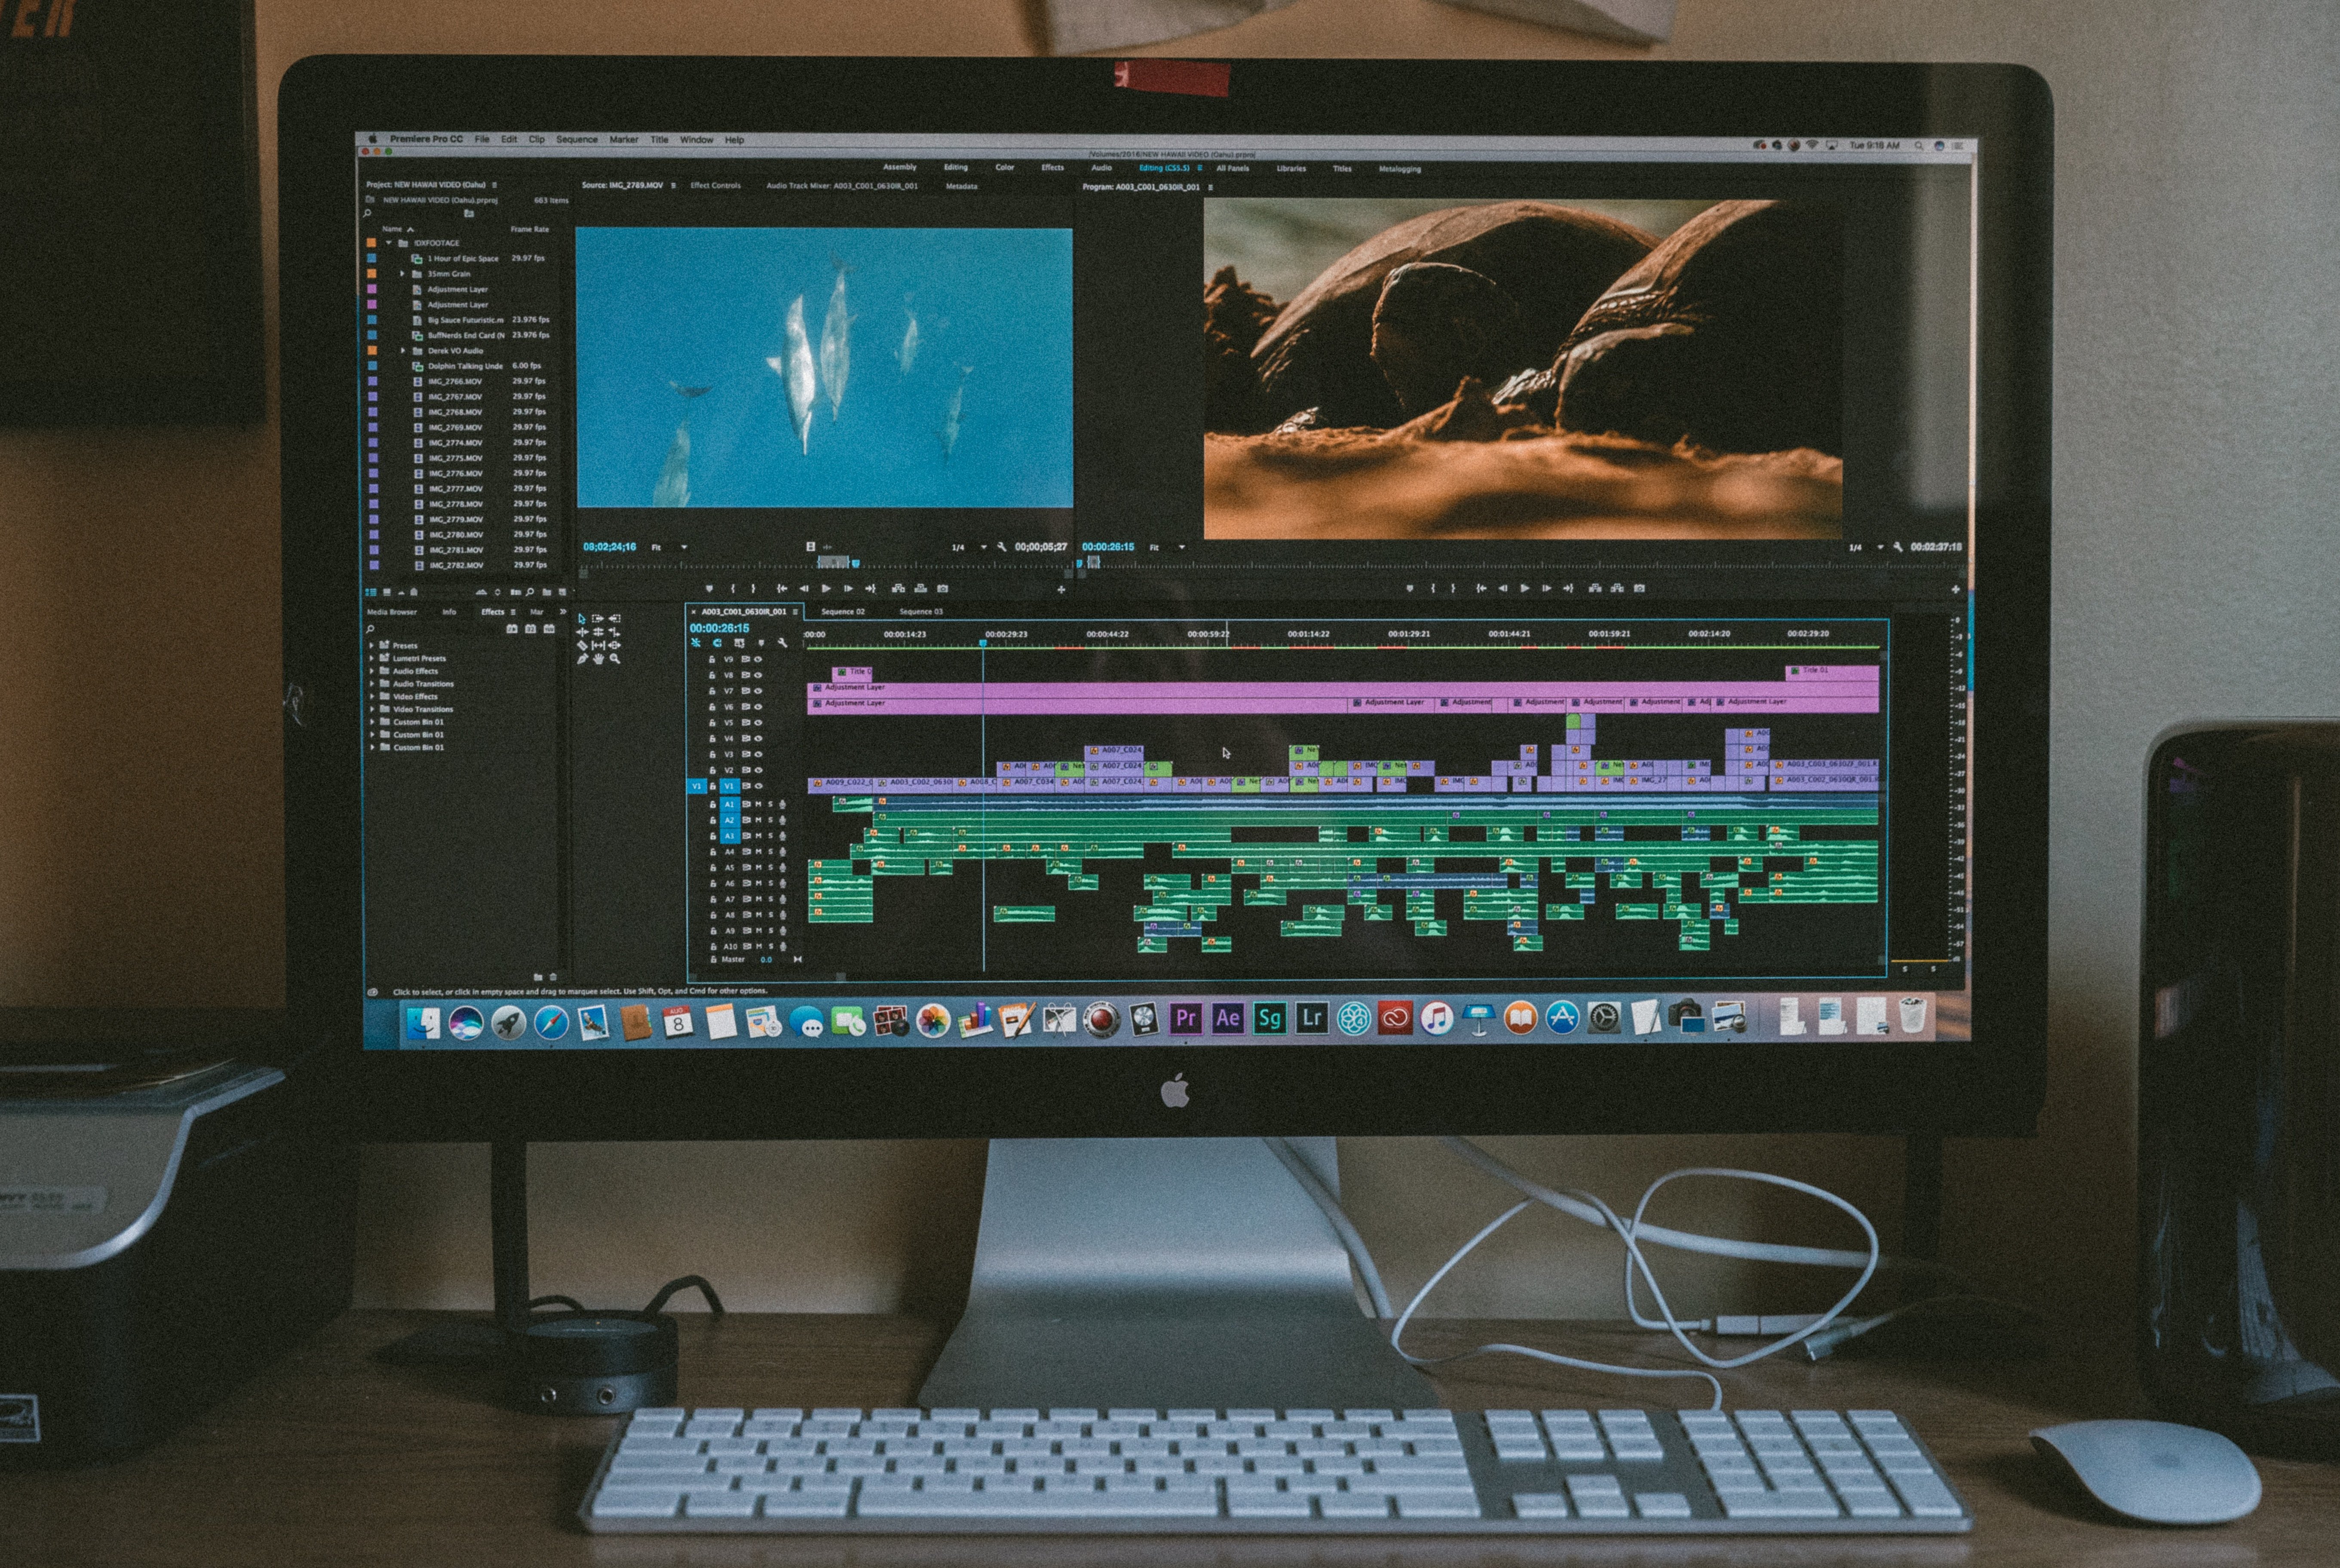
It’s important to understand exactly where you want each clip to start and end before making edits. In video editing, these points are referred to as in and out points. Most software allows you to use the ‘I’ and ‘O’ keys as shortcuts to mark the in and out points of your clips. This allows for an easier time arranging the clips later.
You can express creativity with how you place your clips together to tell the story – and that’s the real fun, right? Your main workspace is called the timeline. This is where you will do the actual editing work. The timeline, in most software, has spaces for video clips, audio clips, and effects. Generally, this works in layers. Placing one above another will hide it from view.
Now that you’ve marked your clips, you can drag and drop them onto the timeline and cut out any extra footage according to the in and out points. This is very likely going to be the longest stage of the editing process for most. Having some sort of storyboard, a series of images or drawings that help you pre-visualize the video, will help speed the project along.
Any good writer knows that the real writing is in the revisions. It’s the same thing for video editors. Go through the full video over and over again to make sure there aren’t any jarring transitions or gaps in the footage, and then watch it one more time just to make sure.
Once your video has been edited together, you can move on to the next step: post production.
Some software has built-in video effects that can be used to enhance the quality of your project. Although, if you are looking for a more advanced or particular effect, specific video effects software exists to meet this need.
Any effects utilized should add to the video, not distract from it. Use these features conservatively and try to choose instrumental music to keep the audience tuned in. Avoid gimmicky transitions, silly fonts, and too much colorization. The focus should be on the footage.
| TIP: Looking to create original music for your video? Check out the best free music making software to take your video project to the next level. |
When you’re certain that you like the end product and it’s ready to go, you can complete the final steps. Rendering your footage allows the software to stitch it together and understand that you’re done moving things around, at least for now. Exporting means that you’re completely finished and want to create one solid file.
To publish, choose the platform you want to share on and upload your video. Make sure to include some descriptive text and tag accordingly so more viewers can find what you created.
You may be wondering how all your favorite YouTube channels are able to make a career from posting videos. This is through the short advertisements that play before or during their content.
If you want to make some side change, opting in to video monetization is the route to go. Be careful though, because using copy-written music or clips will prevent you from following this route.
Before publishing your first video, be sure to optimize your YouTube page. Learn how to create a YouTube channel before jumping in. Small things such as having the perfect YouTube banner size can go a long way in making you look like a YouTube professional.
Check out this portal for more information on YouTube’s monetization policies.
That’s it, you’re done and can watch the views soar! Effective video editing can take a lot of time and requires plenty of patience, but following an efficient workflow will ensure that the end product is professional and meets production standards that people have come to expect.
Even if you are an amateur at video editing, if you follow the steps mentioned in this article, the people on the other end of the screen will never know.


Recently updatedSummer 2026 Grid® Report · Published May 26, 2026 This guide was last...
 by Sudipto Paul
Video editing is no longer limited to filmmaking.
 by Washija Kazim

Video editing has become an essential skill in our digital age.
 by Alexandra Vazquez