

Event name tags seem easy enough. Right?
You have a list of guests attending your event. You take your list, print the name badges, and hand them out. Boom. Done. Right?
Well....sort of.
Having planned events ranging from intimate speaker sessions to global conferences, from Chicago to Australia, I’m speaking from experience – there are a few bumps in the road.
For instance, what do you do when your CEO asks you to register two new guests, and you’ve already got your alphabetized name badges printed, inserted into their holders, and packed to go? Or what happens when a guest shows up on the event day, and for whatever reason you don’t have a name tag for them? Or, you have the name badge, but the attendee’s name is misspelled?
Whichever situation arises in your event marketing execution, I’ve got you covered!
Before we get too in-depth, here's a quick overview on how to make name badges. After the overview, we'll go into plenty of name tag execution tips and tricks.
To make name tags for your next event, first choose the materials you will print the names on. You could buy stickers, or perforated paper and plastic holders designed for name badges. Find the template that goes with the name tag paper you bought, and do a mail merge with the template and your spreadsheet of event attendees. Remember to have everything in alphabetical order in your spreadsheet and when assembling the name tags.
This article will cover each of those steps of name badges in detail, including:
Get ready to read anything and everything you will need to think about when printing your own name tags, plus a bonus section covering those super-fancy conference name badges!
So, let’s go back to basics, starting with the alphabet!
Name badges are an important task on your event planning checklist.
When getting ready to execute that step, be sure you take your spreadsheet of attendees and “sort by alphabet” actually creating any name badges. This will save you a lot of tedious time spent alphabetizing after they have been printed.
It doesn’t matter if you sort them by first or last name, and it’s a simple step, but an important one to remember!
By keeping name tags in alphabetical order each step of the way (printing, assembling into holders, transporting them to your event venue, and unpacking them at the registration table), you will make the registration process efficient for both you and your guests.
|
TIP: Get those attendee names by exporting the attendee list from your event registration software.
|
Ok, yes, the first one is obvious – you will put the guest’s name on the name badge. But there is additional information to think about, such as the company and title.
Name tags are essential in corporate event planning when attendees are focused on networking. However, be aware of putting too much information on each name badge. There’s only so much room on that little cardboard square!
I recommend printing each guest’s name and company.
While it’s fine to include job titles, some of them can be quite lengthy. You’ll avoid the risk of an inaccurate title; an employee could register multiple people and get it wrong. You’ll also keep your name badges clean and easy to read.
Aside from the attendee’s name, you should also have your company’s logo on each name tag. If you are doing the event in partnership with another company, you should also include its logo. Here is an example of name tags printed with two logos from an event run by The Australian Association of National Advertisers in partnership with Starcom:
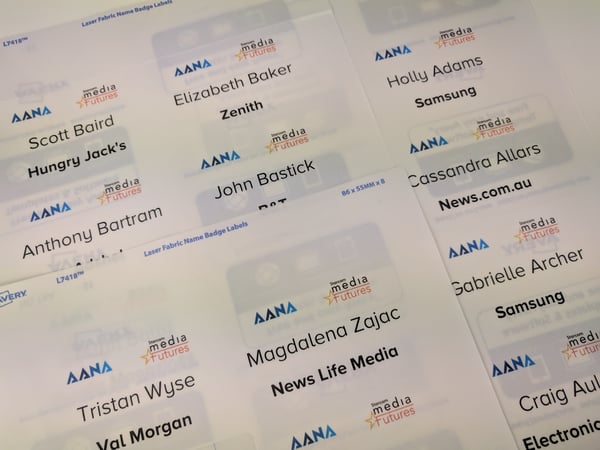
Image Source: The Australian Association of National Advertisers
Once you know the information you want on each name tag (and your names are in alphabetical order!), how do you get those names formatted onto the paper?
The first step is to buy paper which was manufactured for just that purpose. The actual paper you print on will vary based on the type of name badge holder you use. (Meaning, how will that name actually stick to someone’s shirt?)
Keep in mind the name badge holder when you make your decision – make sure the paper you print on will fit the plastic holders!
If using a plastic holder, the “name badge inserts” are a thicker paper, like cardstock, which is perforated for you to split apart.
The other frequent alternative for printed name tags is “adhesive name badges.” Or, as you may know them, “stickers.” (Oh yes, the event marketing world can be quite technical!)
Whichever you decide, once you have purchased your paper, you need to find the correct template online. Every major brand will have a corresponding template for you to download.
For example, Avery, a common brand for name badge supplies, has this page with 52 name tag and badge templates.
When so many of the templates have six to eight name badges on a page, you can’t use sight alone to ensure you’re using the correct template.
Find the item number of the paper (or sticker paper!) you have bought:
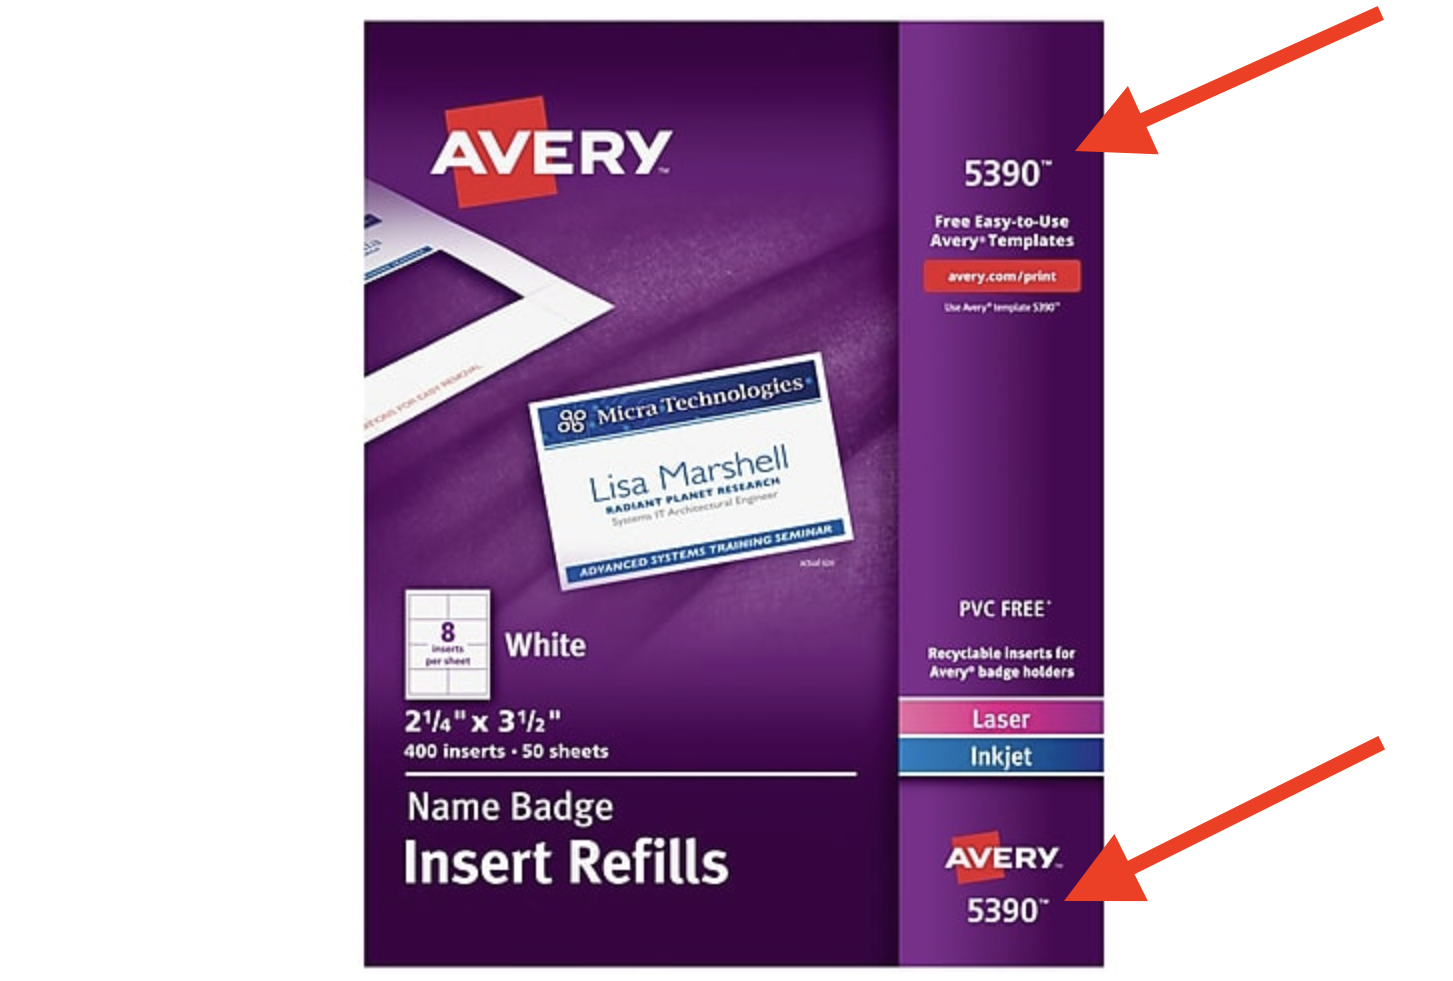
Then, look at the brand you purchased. Find the website with your template, and make sure you find the template with the exact same number:
I have zero doubts you are a very intelligent event planner, but I’m going to bold and repeat that since it’s so critical: Make sure you use the template with the same number!
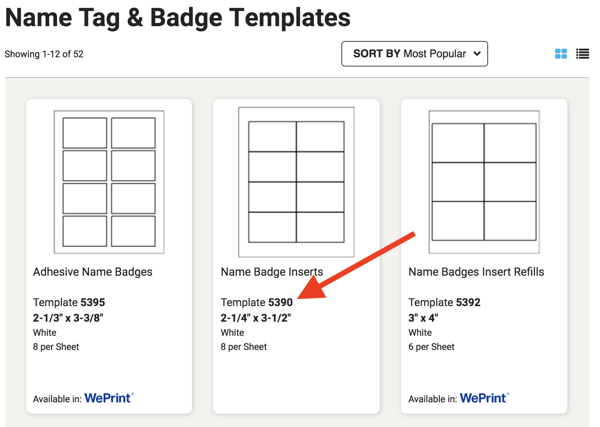
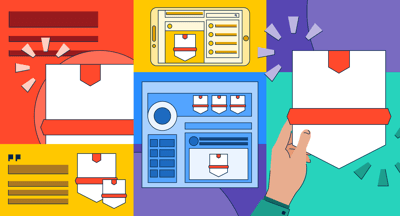
Look at the “adhesive name badges” on the left, and the “name badge inserts” in the middle. They both have eight rectangles.
They don’t look that different in size. Right? It should be close enough if you pick the wrong one. Right? Sadly, that’s a no.
Those small formatting differences will throw off the entire page when printing, and you will literally have to start again from scratch. (Plus you might need to buy more paper!) Save yourself the headaches and get it right the first time!
Once you’ve got your template, do a mail merge, insert the names from your spreadsheet into the template. This will integrate all attendee names into the correct format. You also avoid the risk of misspelling any names.
If you’re not familiar with doing a mail merge, this YouTube tutorial will help. Don’t forget to add your company or event logo on your document!
Once you’ve completed your mail merge, skim the final document to ensure everything turned out the way it was supposed to. My technique? Every few letters of the alphabet, pick a name from your spreadsheet and make sure that name is in your completed document.
Now I will cross my fingers for you that the printer works and is full of ink!
It’s the day before the event. You need to do your final preparation, and have everything ready to go. You print out your name badges, and the printer works! (Woo hoo!)
You carefully insert the printed rectangles into the plastic holders, being sure to keep them in alphabetical order. You’ve got them all packed to go, still in alphabetical order, and you’ve marked that item off of your to-do list. At the exact moment you have the satisfaction of making that “tick!”, your CEO asks you to register another guest. Yup, I’ve had this happen many times. (Okay, every time.)
While it’s great to be prepped and ready as soon as possible, I recommend waiting as long as you are able to print name tags. That way, you will hopefully only have to go through the printing process once!
Even when you wait as long as possible, you can still have last-minute registrants. Or, someone could ask to transfer their ticket. A manager may no longer be able to attend and ask if they can send their co-worker instead.
When this does happen, take a deep breath, and remind yourself it’s part of event planning. Then, you have two options:
And (conveniently!), printing name badges on-site happens to be the next section!
Despite your best efforts, it still happens. You’ll find yourself with a guest standing in front of you...and no name badge for them.
Perhaps an executive at your company told the individual, “I’ll get you registered!” and it slipped through the cracks. Or, a registered attendee could send a coworker to go in their place. In this case, it’s best not to have them walking around wearing the other person’s name!
There are three ways to create custom name badges on the spot:
Unless your name badges are stickers, you need to bring extra holders and blank inserts for any of these options.
If you need to create new name tags, you can ask for a business card. I highly recommend this, especially if you have a growing line of people waiting!
A business card gives you the ability to create the new name tag without feeling rushed. (You also avoid any unnecessary awkward small talk while they stand there waiting!)
Pro tip: Make sure you note what the person looks like, or a specific item they’re wearing. Otherwise you will have created a new awkward situation!
I learned that lesson the hard way, when I found myself walking around with three newly printed name badges to hand out. After successfully locating the first two attendees, I was wandering around looking for the third. Only to realize I could not, for the life of me, remember which “man in a dark suit” I was looking for!
I’ve touched on the option between paper inserts versus stickers when printing name tags. If you decide to use the inserts, there are a variety of name badge holders you can choose.
The types of printed name tags you I'll discuss here are sticker name tags, clip-on name badge holders, pins, magnetic name badges and lanyards.
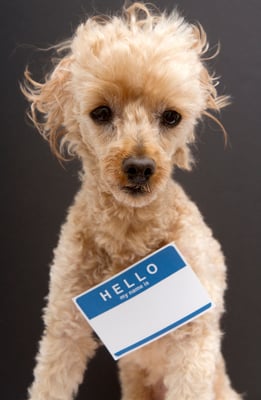
Hopefully that doesn’t put you in the conundrum this anonymous friend seems to be facing:

(Side note, the name of this amazing stock image is “Hello My Name is Who The Heck Knows.” Again, an issue I’m hoping you don’t face!)
He’s got on just about every option there. Each of them, (including stickers,) have something to consider for your event guests.
Stickers are more cost-effective than those requiring a plastic holder; you only need to buy the paper you print on. However, I’m not a huge fan of stickers.
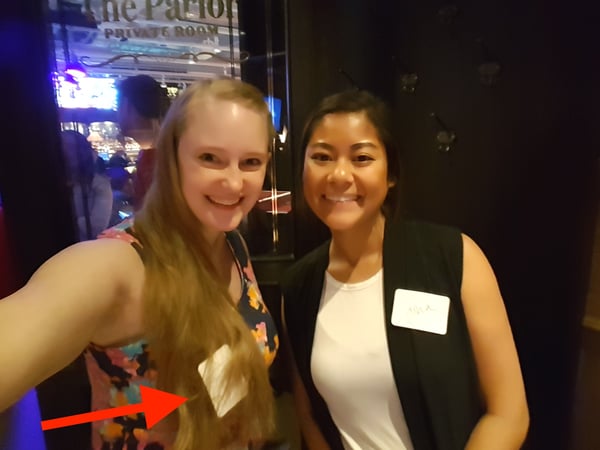
Have I mentioned that I have long hair? And no matter what I do, the sticker always sticks to my hair, not my clothes. ALWAYS. (Anyone else with long hair – can you please tell me if I'm alone here?!)
Half the time I don’t even know it’s happened. Then I meet someone, notice them looking confused as they try to read my name, and, oh....whoops. There it is. My name tag has, yet again, grown legs and jumped the sticky side from my shirt to my hair, hiding my name from potential new friends.
Seriously, I don’t know how it happens. But the worst part is trying to get the name tag off of my hair, without pulling out my hair in the process. Oh yes, and that’s always fun to do when you’re also overcoming those networking nerves!
And, just in case you had any doubts, here's the proof from the last event I went to. (I promise this was NOT staged!)
The desire to avoid my hair being pulled out is not a deal-breaker. Stickers are easy to use, cheap, and shouldn’t damage clothes. Plus they save time, you don't have to make your assembly line as you insert the printed name tags into their holders.
My only point is – it’s worth considering!
Aside from stickers, this is the most common type of name tag. There is a little clip on the back for attendees to attach the name badge to their clothes.
This is great if your shirt has a pocket to clip on the name tag. However, some tops and dresses don’t have a good spot: “Do I clip this to my pocket? The hem of my dress?”
To get around this, you can use a combination name badges, which will have both a clip and a pin. This gives attendees the ability to choose their preference:
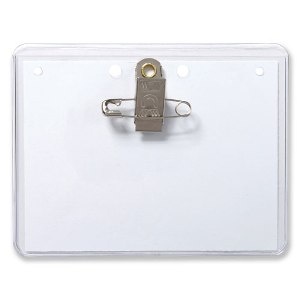
Image source: Marco Promos
Unless you are doing the combo clip and pin, the pinned name tags make me wary; especially when it comes to corporate events.
While you don’t have to worry about the lack of a shirt pocket to clip a name badge, not everyone wants to put holes in their clothes. Yes, the holes are little. But corporate attendees often make an effort to wear nice clothes, sometimes even their favorite. And those can be made of expensive materials, like silk. I’ve had a few moments of furrowed brows as I unpin my name tag, rubbing the fabric and willing the little holes to go away.
Thankfully, the holes are small, and don’t usually leave a lasting hole. Pins are also easy to attach, and they’re not very expensive.
Magnetic name badges are an option, but they tend to be more expensive. This is could be because event planners are concerned guests may not want to stick their hand down their shirt in front of a bunch of strangers. (How else are you going to get the magnetic front and back together?)
However, they won't cause any issues damaging clothes, which makes magnetic name badges beneficial for events. This is where I've experienced using them -- at fundraisers with a cocktail or black tie dress code. (And no one had to put their hand too far down their shirt, I promise!)
In addition to avoiding the issues of stickers or damaging clothes with pins, you don’t need a pocket to clip the name badge onto.
Lanyards are great because they avoid all of the above issues. The biggest drawback is cost; you have to pay for both the plastic name badge holder and the lanyard. If guests don’t remember to return their name badges, the costs will continue to accumulate with your events.
The name badge itself does also hang a little lower, making it harder for a sneaky peak at a new contact’s name. However, most people understand when a fellow attendee is looking to see their name or company. That is after all the point of networking!
It’s worth noting that not every event will require you to physically print your own name badges.
If you are planning a larger event, such as a conference, you might be working with an event management company, which will create them as part of its services. Alternatively, you could pay a printer to produce the name badges. This will require you to have a final guest list with more lead time than if you were printing them yourself.
Conference name badges are more durable, as they are used for multiple days. This is why they are often printed on plastic, such as PVC. To create name badges like the ones pictured below, you can order them from a supplier, or buy your own “ID badge printer.”
These name tags look great (and super professional!), but they also come with a big price tag. A starter kit ranges from $1,100 - $2,500. You will need to continually buy ink and PVC plastic cards, which are more expensive than cardstock or stickers.
Conference name tags are often used with lanyards. Some of them will come in a thin plastic holder, where attendees might place business cards behind their name badge. In this case, they usually aren’t made of a PVC material.
My coworker Kevin manages our events at G2 Crowd, and here are just a few of the many conference name badges he has collected:
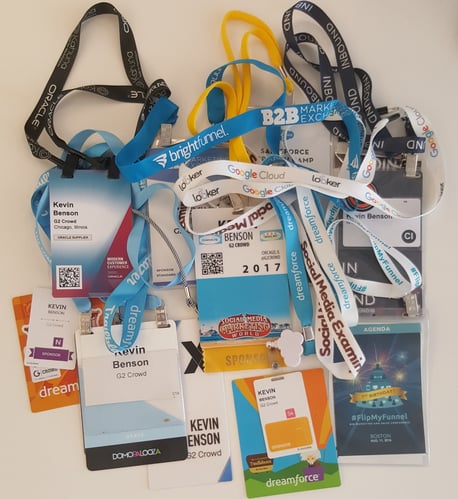
Notice how some of them have a QR code; this will be used to scan attendees when they enter breakout sessions.
Sponsors can also scan that code when attendees visit their booth. For example, if Laura visits our booth at G2 Crowd, we’ll receive her information, including name and email address, enabling us to follow up with her after the conference.
Some of the lanyards display the opportunity to use your name tag as a sponsor benefit; the blue lanyard for the B2B Marketing Exchange was sponsored by Brightfunnel.
While the name badge process can be a bit tedious, it is crucial to a corporate event’s success. And, once you get your process down, you’ll find this part of your event planning process getting faster and faster. Soon you’ll be a name badge pro, speeding through your printing and assembly process in no time!
Whichever materials, printing and trouble-shooting process you choose, my little friend and I know you can do it!
Looking for additional event marketing professional resources? Check out my guide on post-event survey questions and choosing an event venue.
Then, ensure you're making as many name badges as your event venue will hold by booking a speaker your attendees will love. Search the G2 database and find your next speaker who inspires, delights, and happens to be a woman.


It’s a simple rule of business: every brand needs a name.
 by Christine Glossop
Each quarter, G2 awards badges to companies that deliver world-class products and experiences...
 by Erin Boyd

Everything gets outgrown eventually.
 by Hannah Tow
