

Your website is your business's digital front door.
It's where customers learn about what you offer, make purchases, and form lasting impressions. So, the idea of changing web hosting might feel daunting, like packing up a fully furnished store and relocating it overnight without anyone noticing. That’s why evaluating reliable web hosting providers matters before making the move.
But here's the truth: web host migration isn't risky if done right – it's just detail-sensitive. With proper planning, your visitors won't even notice the switch. And when you're moving for the right reasons, like faster speed, better support, and tighter security, the payoff is worth the prep.
Web host migration is the process of moving a website’s files, databases, and settings from one provider to another. It ensures the site runs smoothly on the new server while improving speed, security, support, or scalability without disrupting users.
That process can be fraught with challenges that most businesses aren't aware of or prepared to handle. Here's an overview of how the process works from start to finish to help companies that need to migrate their sites to a new web host.
We'll cover some of the major reasons you might need to switch web hosts, when it's best to seek professional help, and how to create a step-by-step plan to move your site without causing breakage or significant downtime. Let's dive in.
There’s no universal timeline for when a business should change web hosts – but if your website is starting to feel sluggish, insecure, or unsupported, it may be time to make the move.
Most web host migrations aren’t impulsive decisions. They stem from performance gaps, service frustrations, or business growth outpacing your current setup. It’s not just about “switching hosts” – it’s about ensuring your website keeps up with your business goals.
Here are the most common reasons companies choose to migrate:
Migrating your site doesn’t have to mean something’s “wrong.” Often, it’s just a natural evolution, a strategic upgrade to ensure your infrastructure matches your ambitions. The key is to recognize when your current setup is holding you back and approach the migration process with a plan, not panic.
Migrating your website isn’t necessarily difficult, but it is high-stakes. If something goes wrong, the ripple effects can hit your SEO, sales, and brand reputation all at once. That’s why one of the first decisions you’ll need to make is to manage the migration yourself or hire a professional.
The right answer depends on two things: the complexity of your site and your comfort with technical tasks like DNS configuration, database transfers, and server permissions.
Suppose your website is pretty simple and doesn’t rely on advanced backend functionality. In that case, you may be able to handle the migration on your own, especially if you’re comfortable using tools like FTP or working within a CMS.
Here are a few signs you’re in good shape to DIY:
If any of this sounds like your setup, the risk of something going wrong is fairly low, and most modern web hosts offer helpful guides or even automated tools to walk you through it.
On the other hand, don't take chances if your website plays a mission-critical role in your business or if you're not 100% confident in managing the technical details. Some signs it's worth investing in expert help include:
Remember: hiring a pro doesn't mean handing off the whole process. Many businesses opt for a hybrid model, in which they handle the early prep work themselves (like backups and inventory mapping) and bring in help for DNS changes or database migration.
Whether you’re managing the migration yourself or collaborating with a specialist, the first step is to create a detailed, organized migration plan. This ensures minimal downtime and protects both your site data and SEO performance.
Here’s a snapshot of the entire process to give you a roadmap:
| Step | Task | Estimated time | Tools needed |
| 1 | Create a site inventory | 30 - 60 mins | Screaming Frog, Google Sheets |
| 2 | Back up your site | 30 mins | FTP client, cPanel, plugin |
| 3 | Transfer files & databases | 45 - 90 mins | FTP, phpMyAdmin |
| 4 | Prep DNS + test staging | 1 hour | Domain registrar, browser |
| 5 | Update DNS + monitor | 24 - 48 hours | DNS Checker, Google Search Console |
Once you’ve mapped everything out, it’s time to make a complete backup — your insurance policy in case something breaks during migration. You’ll need to back up both your website files and your database.
Choose based on your hosting environment:
Watch out: If you skip this step, you risk losing important files, URLs, or SEO data.
After you've cataloged your existing website, the next step in the migration process is to make a complete backup of everything on your current web host's servers. Think of this as your insurance policy. A full backup ensures you can roll back if anything goes wrong.
Choose the method that aligns with your current hosting environment:
| mysqldump -u [username] -p [database] > backup.sql |
Pro tip: Check out the top-rated backup software on G2 to simplify and automate recurring backups.
Migrating isn't just drag-and-drop — it’s a precise transfer of both your site files and database, followed by testing everything in a controlled staging environment. This ensures your site works exactly as expected before you flip the switch live.
/public_html, /wp-content, etc.).sql filewp-config.php) with the new DB name, user, and passwordBefore pointing your domain to the new host, make sure everything works behind the scenes. This staging step helps you catch bugs, broken links, or missing files before your users see them.
Use different browsers and devices to catch layout issues or mobile bugs
To prevent duplicate content issues, make sure search engines can't access your staging site:
robots.txt file with:| User-agent: * Disallow: / |
Google indexing your staging site can hurt SEO — block it until the site is live and error-free.
With your new hosting environment tested and verified, it’s time for the final step, which is making your new site live by updating your DNS settings. This ensures that when someone types your domain into their browser, they’re directed to your new server.
Done right, this step minimizes website downtime and preserves SEO and user experience.
1. Log in to your domain registrar (e.g., GoDaddy, Namecheap, Google Domains)
2. Find your domain’s DNS Management or Zone File section
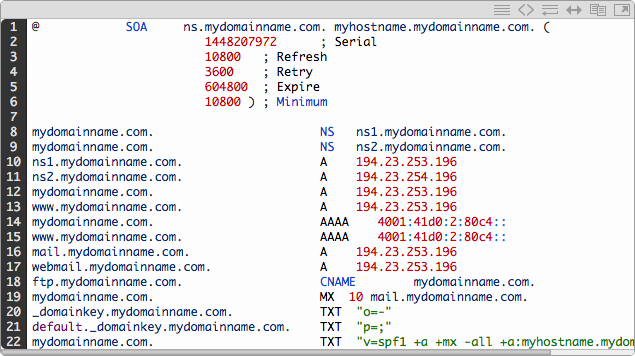
3. Update your A Record:
| Type: A Host: @ Value: 192.0.2.123 |
4. Update the CNAME Record (if used for www):
| Type: CNAME Host: www Value: @ or your root domain |
5. Save changes and wait for DNS propagation
DNS changes can take up to 24 - 48 hours to fully propagate across global servers. To reduce downtime risk, avoid making DNS changes during peak traffic hours. Weekends or evenings are ideal.Migrating your site can disrupt your search rankings — unless you take active steps to preserve your SEO foundation. Use this checklist to protect your visibility before, during, and after the switch.
| Area | Best Practices |
| Redirects & URLs | - Set up 301 redirects for all changed URLs - use a redirect map (Old → New)- don’t delete old URLs prematurely |
| Metadata & tags | - Retain all title tags, meta descriptions, and canonical tags - preserve schema markup - avoid auto-rewrites by CMS |
| Indexing & visibility | - Resubmit sitemap in Google Search Console - verify indexing via URL inspection tool - monitor crawl errors or traffic dips |
| Technical safeguards | - Update all internal links - test structured data using rich results test - check bounce rate and user engagement |
Got more questions? Get the answers here!
Before you begin, back up everything — files and databases. Use FTP or a CMS plugin to ensure a full restore is possible on the new host.
Basic migrations take a few hours. DNS updates may take 24–48 hours to fully propagate worldwide.
Not if done right. Keep URLs the same, set up proper 301 redirects, and resubmit your sitemap to search engines.
You can DIY if your site is simple. For eCommerce, SEO-heavy, or custom setups, a developer or migration expert is recommended.
Log in to your domain registrar, update your A and CNAME records with the new host’s IP, and monitor propagation over 24–48 hours.
Yes. Use a staging site or plugin to prepare your site in advance, then switch DNS during low-traffic hours.
Tools like FileZilla, UpdraftPlus, Duplicator, and cPanel backups help streamline the process. Some hosts also offer automated migration services.
Skipping backups, forgetting redirects, letting Google index a staging site, or missing database credentials are common pitfalls.
Test everything. Re-submit your sitemap, check SEO tags, confirm SSL is active, and monitor traffic in Google Analytics and Search Console.
As you can see, the physical process of migrating a business website to a new hosting service is straightforward in most cases. But you should avoid making any assumptions about how it will translate to your specific business website. That's why it's a good idea to seek out any help you need along the way and take nothing for granted. Better still, if you're not certain that you can handle the job, hire someone who's got the right skills and experience to get it right the first time.
If you do choose to tackle the job yourself, make sure to take as much time as you need on the planning and testing phases of the process. Migrating your business website isn't a race. If you do it the right way, your customers won't know that anything is going on, no matter how long it takes. If you don't, they'll know right away, and they'll let you know about it.
However, you choose to proceed, you should now at least understand what's involved in migrating a business website from one web host to another. As they say, knowledge is power, and you now have the power to manage this all-important process with as much or as little direct involvement as you'd like.
If your migration goals are mainly cost savings, shared hosting can be a smart first step. Explore our guide on shared hosting to see if it’s the right fit for your business.
This article was originally published in 2021. It has been updated with new information.


Video hosting may seem simple until a team actually relies on it. What starts as “we just need...
 by Washija Kazim

Choosing a hosting plan is one of the first steps in building a website. The type of hosting...
 by Sagar Joshi

Managing video content today isn’t as simple as uploading a file and hoping it plays smoothly.
by Yashwathy Marudhachalam