

Swift is fast, that was easy.
The Swift programming language was first developed by Chris Lattner in 2010, and later announced by Apple in 2014 at the annual Apple Worldwide Developers Conference. While it’s still relatively young, it has been through minor and major updates, with the most recent release of Swift 5 in 2019.
Swift is a general-purpose, high-level programming language for Apple products that run on macOS, iOS, watchOS, tvOS and other platforms like Linux and IBM’s z/OS. The language is safe, fast and interactive which makes it popular among novice and advanced developers. Swift is designed to work with Apple’s Cocoa frameworks and was originally based Objective-C along with the runtime library which allows C, Objective-C, and C++ to run in the same programs with Swift.
Swift can be used to write software for applications on mobile devices, desktops, servers, and anything else that runs code. It’s commonly used by programmers that specifically only develop apps for Apple products.
Swift is a relatively new language, so it takes advantage of modern technology and its capabilities. However, it was developed using the best concepts from a variety of different programming languages such as Objective-C, Rust, Haskell, Ruby, Python, and more.

If you want to develop iOS apps, you should know Swift – plain and simple it's the most popular programming language for the platform. Swift is an open-source language, meaning anyone is welcome to contribute to it. It’s a static language with the main advantages being speed and security. The language is less tedious than others, as the syntax is generally cleaner, omitting the bells and whistles. Swift has a growing development community and a wide variety of resources behind it, which makes it less daunting for new programmers.
Finally, Swift also scales easily. It’s simple to maintain as code written in earlier versions of Swift can be updated quickly. It also uses Automatic Reference Counting (ARC) to manage your app’s memory usage in real time.
Integrated Development Environment (IDE) software provides programmers with tools to develop apps, primarily acting as the interface used to write, compile, and debug code. Some IDEs are built for specific platforms, often with a language preference – for instance, Apple created the Xcode IDE for Mac users but it is compatible with other languages outside of Swift. Read reviews from real users to better understand which solution is best for you.

Syntax refers to the layout of a programming language. For example, the syntax of an email would refer to the placement of the “.” or “@” symbols. If they aren’t in the proper order, it won’t work – similar to programming languages and coding. Simply put, you have to follow the syntax rules of the specific language. Now, let’s write and run our first Swift program.
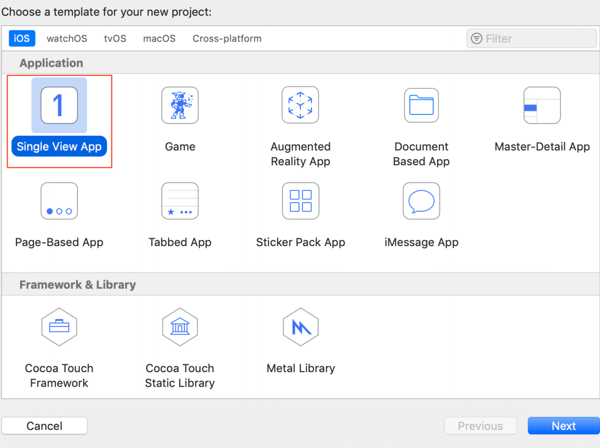
Open “Xcode” and select “Create a new Xcode project” from the options listed. Next, click on the “iOS” tab and choose the “Single View App” and hit “Next”.
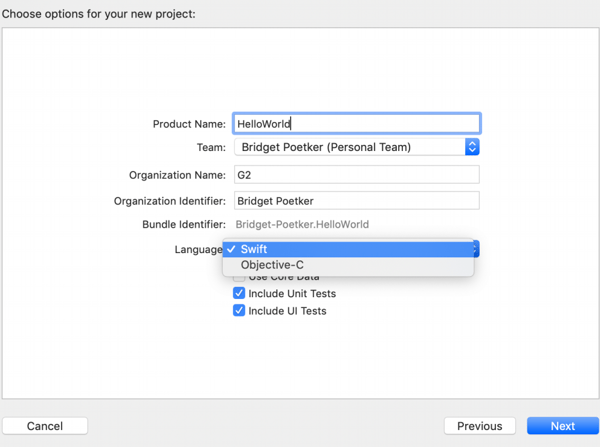
Name your product “HelloWorld”, then from the language dropdown menu select “Swift”. Notice that the Bundle Identifier automatically generates to “Bridget-Poetker.HelloWorld” from the product name and organization identifier. Click “Next”.
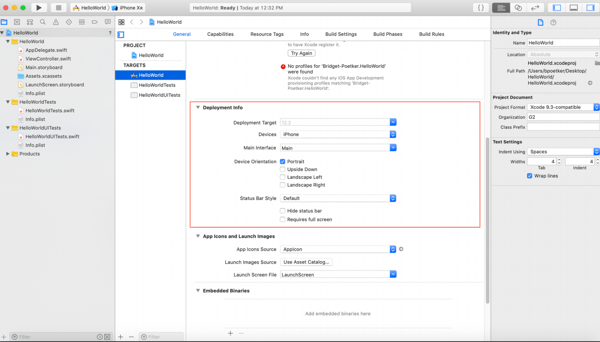
On the center pane, scroll down to the “Deployment Info” section. From the devices dropdown, select “iPhone” and make sure only “Portrait” is checked for device orientation. Everything else can stay the same.
Select “Main.storyboard” from the file structure on the left pane. This is where we will create the user interface for our app.
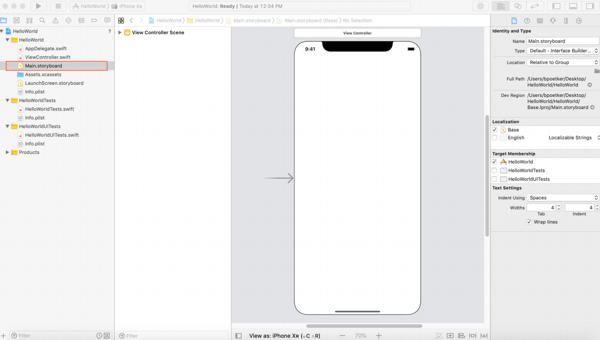
Click “View Controller Scene” to expand, then click again on “View Controller”. Open the Objects Library by clicking the button in the top left (looks like the iPhone Home button).
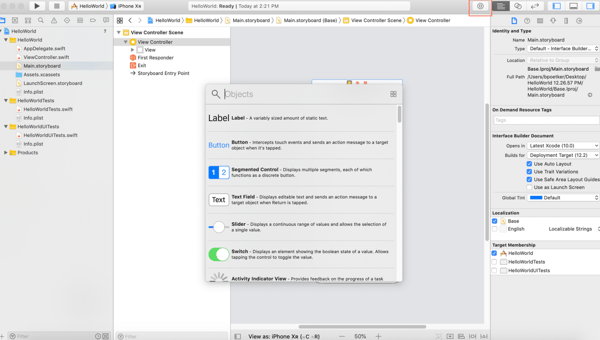
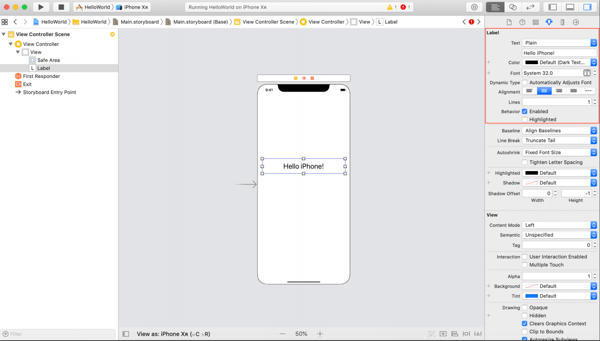
Pause and make sure the “View Controller” option is highlighted. From the Objects Library pop-up, drag and drop the “Label” option onto your view. Resize and center using the guides provided. With the label selected, change the alignment to centered text and bump up the font size in the right pane. Just above that, in the text box that says “Label” change it to “Hello iPhone!”. Make sure your label has plenty of breathing room because the output we create will also be popping up there.
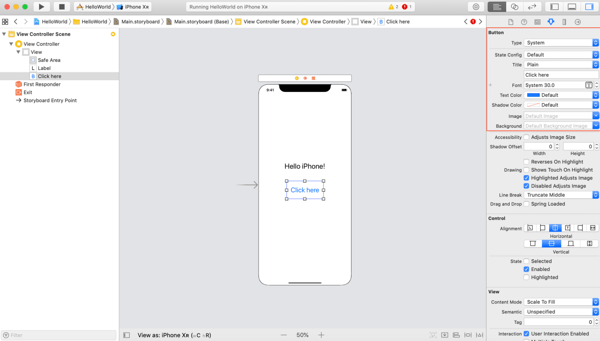
Then open the Objects Library again to drag and drop a “Button” onto the screen. Resize the object and input “Click here” as your text.
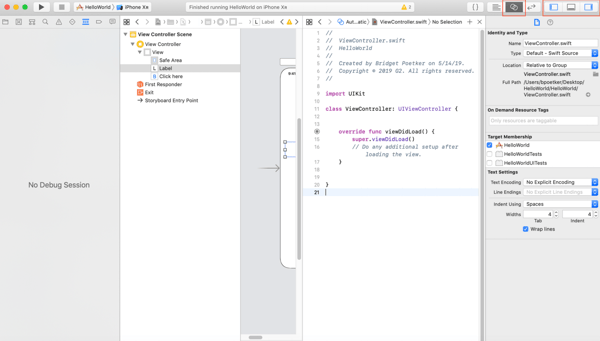
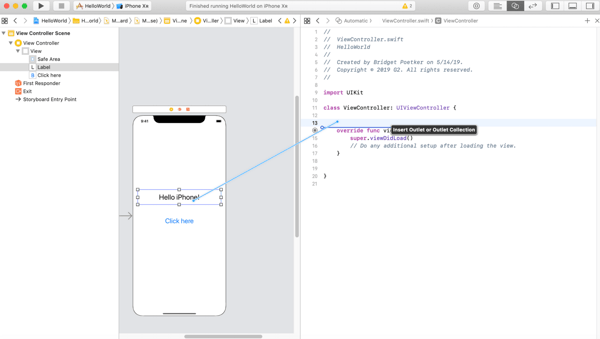
Now we need to actually write some code to tell the app what to do. Click on the “Assistant Editor” button in the top left (looks like a Venn Diagram) to see the view controller and main storyboard side by side. Close the other panes by clicking the buttons located in the top right of the window.
We need to form a connection between the various objects and the associated code. To create an outlet, right click (or ctrl+click) on the name label and drag it just below the “UIViewController” in the code, a blue line should appear. Let go. Name it “label” and click on the “Connect” button.
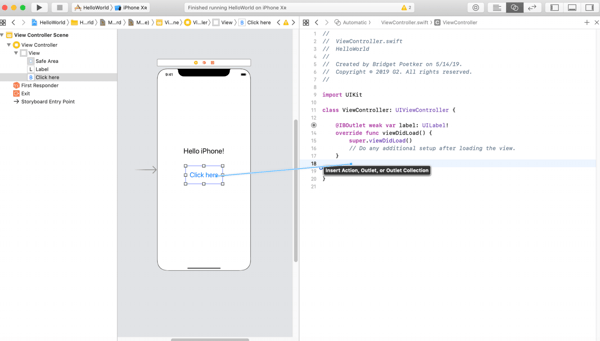
To create an action for the button, right click on it and drag it below the text field outlet. Make sure the first drop down says “Action” and name it “button”. Click “Connect”.
At the very end of the line we just added, hit enter to start a new line within the curly brace of the Action. Type “ self.label.text = "Hello World!🌎" ”.
Now it’s time to run your application! Click run, or the play icon, in the top left. If your code is correct, you’ll get a “Build Succeeded” pop up on your screen and a simulator will appear.
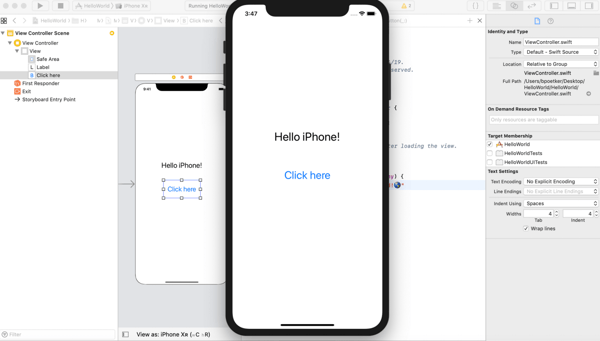
Give it a test run, click on the button and your response should appear.
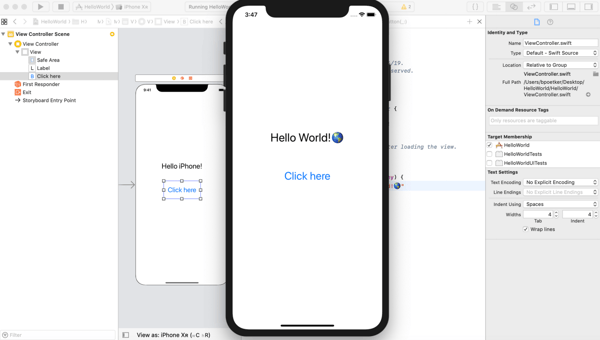
Congrats, you did it! You’ve successfully created your first iPhone app using Swift. This was a very basic tutorial, and as you feel more comfortable with the language your apps will become more advanced.
As Apple continues to expand its ecosystem, Swift will become increasingly important. The fast adoption of the Swift programming language means more future frameworks and features will be available to developers.
Can’t get enough code? Learn more about Java, the #1 programming language.

No, it’s not the equivalent of a B-.
by Bridget Poetker

It just might be the holy grail of programming languages.
by Bridget Poetker

The mobile industry is booming.
by Bridget Poetker